Thursday, July 7, 2011

Summertime!

Mint Chocolate Ice Cream Cake
The burning question right now is what I am going to do when I am done with culinary school.

This fall I will be an intern - hopefully in some wonderful New York City bakery - and I'll get to keep learning. That is the part I am excited about. After that I really want to start developing my own recipes. And I might start telling all of my neighbors that they should think of me the next time they need a cake for a special occasion.

A friend suggested that I start writing about easy dinners for working couples. I don't think I am destined to be the next Rachel Ray with a cookbook of 30 minute meals. But maybe my friend was onto something and I I should try to capitalize on what I love to do most: quick and easy desserts that look impressive, but take little effort.

This mint chocolate ice cream cake is the perfect example. It's my twist on a suggestion I found a while back in Mary Engelbreit's "Sweet Treats Dessert Cookbook.''

Before culinary school I used to cheat and buy a ready made Oreo Crust for this cake and it tasted pretty great. This year I thought I had to make my own crust. I separated 20 Oreo cookies and scooped out the cream. Then I crushed the cookies in a food processor, drizzeled 4 tablespoons of melted butter over it, pressed it into a pie plate and froze it for about an hour.  The crust was a little stubborn when I went to cut up the cake. It didn't want to come out of the pie plate, but when I wrestled it out, it did taste wonderful. Maybe next time I'll use less butter or won't press it so tightly together.

The secret to this cake is buying premium quality ice cream. I use 2 pints Haagen-Dazs mint chocolate. I like it because it doesn't have any artificial color to make it green. Then I let the ice cream sit on the counter til it's soft, empty it into a bowl and stir in some green creme de menthe. Next spread the ice cream in the crust and freeze it until it's set. I usually do this over night.

Now comes the fun part: decorating! Place half a pint of heavy cream in a mixer and whipped with a tablespoon of sugar to make a whipped cream that will hold its shape if you want to put it in a piping bag. I also use Andes candies and run a vegetable peeler over a bar of chocolate to get shavings that I scatter on top of the cake.

But you can decorate it anyway you want to make your own perfect summertime treat. Thin Mint girl scout cookies would work really well too if you have any left in the house.

The best part is it takes minimal effort and it will impress the heck out of your friends.

Oh, and did I mention how wonderful and refreshing it taste? Yum!

Tuesday, May 31, 2011

Bread Alone


I can't tell you how happy I am that the height of the anti-carb craze is behind us.

Man (and woman) may not live on bread alone, but life is pretty dreary without it.

There is some inexplicable pleasure in dipping a crusty loaf of Italian bread in a rich tomato sauce I can't even put into words. How can anyone resist spreading a garlicky hummus on pita, or creamy brie on spread on slices of a crunchy crusted bread? Those are moments that just make life better.

We've been eating bread for so long it's mentioned in the bible. If people could make bread all those eons ago without ovens that have a thermostat dial in their homes, than it should be something anyone can do today, right?

Then why don't more people make bread at home?

For some reason yeast is a scary thing for home bakers. I am so glad that culinary school helped me get over this fear. Now all I want to do a day off is make a few loaves of bread I can stick in the freezer and use for the weeks ahead. And the bread I make at home doesn't have high fructose corn syrup or half of the other ingredients that are in the loafs of bread sold on the supermarket shelves.

It helped to learn from one of the best bread makers in the country - Sim Cass, a founding baker at Balthazar- to get over my fear of making bread. I am here to tell you that making bread is one of the easiest things to do and one of the most satisfying. It doesn't require a store bought bread maker. And who wouldn't feel proud after making something of such basic sustenance.

So let me unlock the bread making mystery. It starts with Jeffrey Hamelman's "Bread" book. It has about 80 pages of introduction that explain the bread making process and recipes that are adapted for both the home cook and professional baker.

I haven't ventured past the first chapter yet, breads made with a pre-ferment. That simply means the night before you want to make bread, stir water flour and yeast together in a bowl and cover it with plastic wrap. It might look something like plaster, and creates a stick substances that is pain to clean off your spoon. But over night the magic happens: the yeast starts to do it's work. The next morning the mixture will have doubled in size and be filled with air bubbles - a sign that you have done it right.

Success -a very bubbly pre-ferment!

Here is an easy follow bread recipe that should only take a few hours the next morning and doesn't require much fancy handiwork to shape into loaves. Just remember your pre-ferment needs about 12-16 hours to mature before you start making your dough, so plan accordingly and you won't be trapped in the house all day waiting for it to rise (like I usually am because my preferments are never ready to go before noon).

Oh, wait, let me give you a few other tips first. The secret to bread's crispy crust? Professional ovens have a feature that steam inside the oven to create the crust. Sadly, that is a tough one to replicate, but Chef Sim advised to spray water from a bottle on the outside of the loaf before baking.

Bread is also also baked directly on the floor of the oven, not on racks. In a home oven the best way to replicate this is to place baking sheets in the oven as it preheats and cook the bread directly on the sheets. You can place a little corn meal to stop it from sticking.

Pain Rustique
Adapted from "Bread: A Bakers Book of Techniques and Recipes"
Makes three loaves. Three hours prep time not including the pre-ferment made the night before

The Poolish (or pre-ferment)

1 pound or 3 5/8 cups high gluten bread flour
1 pound or two cups water
1/8 teaspoon instant dry yeast

Pour the water in a bowl, disperse the yeast on top of the water, add the flour and mix until smooth (it will look something like plaster). Cover the bowl with plastic wrap and let stand for 12-16 hours at about 70 degrees.

Get a good nights sleep!

The Dough:

1 pound high gluten bread flour
6.1 oz or 3/4 cup water
all the pre-ferment
.6 oz or 1 tablespoon salt
.17 oz or 1 1/2 tsp instant dry yeast

Add the pre-ferment, flour, and water in a mixing bowl and mix using a bread hook at first speed until it just comes together. Don't add the yeast and salt just yet! Let it rest, covered in plastic for 20-30 minutes. Then sprinkle the salt and yeast on top and mix on second speed for 1 1/2 - 2 minutes.


Bulk Fermentation
This is when you let the dough rest and rise. Let the dough sit in the bowl covered with plastic. Do laundry. Call some friends. Read a book. You have about 70 minutes while the yeast does it's work and you don't have to do very much anything. Just give the dough a few turns once after 25 minutes and again at 50 minutes (turn each side of the dough in toward the middle once, press firmly into the center and then flip over).
 
Dough resting in a lightly oiled bowl on my counter top
 Dividing:

After 70 minutes divide the dough into three one pound two ounces sections (if you don't have a scale divide in three). Don't tear at the dough use a dough knife or regular knife. Place the pieces on a floured linen on a baking sheet, cover with plastic and let rest for another 20-25 minutes at 76 degrees. This is the final fermentation stage. A little humidity doesn't hurt at this point. In the winter I've turned on my shower (our bathroom is off of the kitchen) and let the kitchen get a little steamy.

At this point pre-heat the oven to 460 degrees with the baking sheets inside. When the dough is ready slash it with a razor across the center, spray with water, place on the baking sheets in the oven and bake for about 35 minutes, until it's nice and dark.

My bread right out of the oven - I am so proud!

Tuesday, May 10, 2011

A Volunteer at the James Beard Awards

I wonder if film students in L.A. get to volunteer at the Oscars?

Because that is what it felt like for me volunteering last night at the 2011 James Beard Awards Gala.

I was so lucky to be teamed up with the chefs from Clio Restaurant in Boston. They were a bunch of very laid back tattooed all over kind of guys. But best of all, they had done all their food prep in Boston and brought their amazing white curry trip dish ready for service. So I had hours and hours to wander around before they needed help plating to serve the 1,800 guests.

Preparations for the James Beard Awards Gala at Avery Fisher Hall 

I saw Food Network star Anne Burrell talking on her cell phone on the Red Carpet waiting to get into the event. Bobby Flay signed my program after I babbled something about loving Throwdown and eating at Mesa Grill for my birthday. I had a Jersey Pride moment when Chef Vola's in Atlantic City was recognized as an American Classic.


Anne Burrell outside Lincoln Center

One of my favorite moments was Gabrielle Hamilton's acceptance speech for Best Chef in New York City. In talking about how much she loved her profession, she exclaimed: "We don't spill oil on the shore line. We don't rob people of their money. It's pretty honest work.''

That kinda summed up why I enrolled in Culinary School after working for 14 years as a reporter. Chefs make people happy. They expose us to new cultures and new ideas. They feed the hungry and the sick. Sometimes I feel like studying baking and pastry is a totally self indulgent and I worry that my life won't be any different when I am done. But I believe people who cook for a living do important things, shape our relationships with food, and are part of an amazing tradition that goes back to ancient times. And hopefully I will have a shot at doing something memorable like starting the next great dessert trend.

In case you haven't realized it, I am totally star struck. Last night I got to be part of the biggest event of the year in the food world. I got to sample creations from some of the best chef's in the country. But now it's time for this aspiring pastry chef to come down from cloud nine and head back to my paying job.

If I am lucky tonight I will have time to grab a slice of pizza from a restaurant in a Jersey strip mall before heading to cover a school board meeting. But I will probably still have a big smile on my face remembering all the fun I had last night.

Complete list of James Beard 2011 Award winners: 

Best New Restaurant
ABC Kitchen, New York City; Chef/Owner: Jean-Georges Vongerichten; Owner: Phil Suarez

Outstanding Chef Award
José Andrés, minibar, Washington, D.C.

Outstanding Pastry Chef Award
Angela Pinkerton, Eleven Madison Park, New York City

Outstanding Restaurant Award
Eleven Madison Park, New York City; Owner: Danny Meyer

Outstanding Restaurateur Award
Richard Melman, Lettuce Entertain You Enterprises, Chicago

Outstanding Service Award
Per Se, New York City, Chef/Owner: Thomas Keller

Outstanding Wine and Spirits Professional Award
Julian P. Van Winkle, III; Old Rip Van Winkle Distillery, Louisville

Outstanding Wine Service Award
The Modern, New York City; Wine Director: Belinda Chang

Rising Star Chef of the Year Award
Gabriel Rucker, Le Pigeon, Portland, Ore.

Best Chef: Great Lakes (Illinois, Indiana, Michigan, Ohio)
Alex Young, Zingerman’s Roadhouse, Ann Arbor, Mich.

Best Chef: Mid-Atlantic (Washington, D.C., Delaware, Maryland, New Jersey, Pennsylvania, Virginia)
Michael Solomonov, Zahav, Philadelphia

Best Chef: Midwest (Iowa, Kansas, Minnesota, Missouri, Nebraska, North Dakota, South Dakota, Wisconsin)
Isaac Becker, 112 Eatery, Minneapolis

Best Chef: New York City
Gabrielle Hamilton, Prune, New York City

Best Chef: Northeast (Connecticut, Massachusetts, Maine, New Hampshire, New York excluding the five boroughs of New York City, Rhode Island, Vermont)
Tony Maws, Craigie On Main, Cambridge, Mass.

Best Chef: Northwest (Alaska, Idaho, Montana, Oregon, Washington, Wyoming)
Andy Ricker, Pok Pok, Portland, Ore.

Best Chef: Pacific (California, Hawaii)
Michael Tusk, Quince, San Francisco

Best Chef: South (Alabama, Arkansas, Florida, Louisiana, Mississippi)
Stephen Stryjewski, Cochon, New Orleans

Best Chef: Southeast (Georgia, Kentucky, North Carolina, South Carolina, Tennessee, West Virginia)
Andrea Reusing, Lantern, Chapel Hill, N.C.

Best Chef: Southwest (Arizona, Colorado, New Mexico, Nevada, Oklahoma, Texas, Utah)
Saipin Chutima, Lotus of Siam, Las Vegas, and Tyson Cole, Uchi, Austin, Tex. (tie)

Who’s Who of Food & Beverage in America Inductees
Jonathan Gold, Writer, LA Weekly, Los Angeles
Lee Jones, Farmer/ Owner, Chef’s Garden, Huron, Ohio
Charles Phan, Chef/Owner, The Slanted Door, San Francisco
Frank Stitt, Chef/Owner, Highlands Bar and Grill, Birmingham, Ala.
Nick Valenti, CEO, Patina Restaurant Group, New York City

America’s Classics Awards
Chef Vola’s, Atlantic City, N.J.; Owners: Louise Esposito, Michael Esposito, Michael Esposito Jr., Louis Esposito
Crook’s Corner, Chapel Hill, NC; Owner: Gene Hamer
Noriega Restaurant and Hotel, Bakersfield, Calif., Owners: Linda Elizalde McCoy and Rochelle Ladd
Le Veau d’Or, New York City; Owner: Robert Tréboux
Watts Tea Shop, Milwaukee; President and CEO: Sam Watts

Lifetime Achievement Award
Kevin Zraly

Humanitarian of the Year
FareStart

Friday, April 29, 2011

The Search for the Best Brownie Recipe


I never thought I would come across a recipe that could match Nick Maglieri's Supernatural Brownies. They are deep, rich, moist, and simple to make. All the characteristics of the best brownies recipe in my book.

But that was before I discovered Baked in Red Hook, Brooklyn.  I love everything about the place from the incredible frosting on the cup cakes to the owner's story. Baked was founded by Matt Lewis and Renato Poliafito. They met while working at an advertising agency, but their first love was dessert. All the stories I came across about the pair said they were tired of the cupcake craze and cakes that were shaped like purses, but tasted like cardboard. Matt Lewis went to ICE (back when it was still the Peter Kump School) at night and the two ended up opening a wonderful bakery with a focus on classic American desserts, made even better.

So back to the brownies.

While I was doing research on Baked and toying with the idea of interning their for class (why 'o why is there no subway that goes to Red Hook) I came across my new favorite recipe: Matt and Renato's Baked Spicy Brownie. It has so much flavor it left me speechless. After my first bite I had a look on my face that made my husband jealous. They are that good. These brownies earn my high praise because they have a little kick to them with some ancho chilli powder, fresh ground ginger (I used grated fresh ginger root - amazing) and cinnamon. I gave some to friend of mine and she told me they were too good to share with her husband. I take that as the highest compliment.

My deepest thanks to Matt and Renato for coming up with the best brownies recipe imaginable!

The Baked Spicy Brownie

Ingredients
  • 3/4 cup all-purpose flour
  • 1/4 tsp. salt
  • 1 Tbsp. plus 1 tsp. Dutch cocoa powder
  • 1 Tbsp. ancho chili powder
  • 1/2 tsp. cinnamon
  • 5 ounces coarsely chopped dark (60 percent) chocolate
  • 1 stick unsalted butter , plus more for pan
  • 3/4 cup granulated sugar
  • 1/4 cup packed light brown sugar
  • 3 large eggs
  • 1 tsp. pure vanilla extract
  • 1/4 tsp. freshly grated ginger
Directions
Preheat oven to 350°. Butter sides and bottom of a glass or light-colored metal 8" x 8" pan.

In a medium bowl, whisk together flour, salt, cocoa powder, chili powder, and cinnamon.

Configure a double boiler (fill a medium saucepan with 2 inches of water and fit a metal bowl on top without letting it touch water; bring water to a boil). Place chocolate and butter in bowl and stir occasionally until both are completely melted and combined, about 6 minutes. Turn off heat, but keep bowl over water and add both sugars. Whisk until completely combined and remove bowl from pan. Let stand until room temperature, about 20 minutes.

Add eggs to chocolate-butter mixture and whisk until just combined. Add vanilla and ginger; whisk to combine. Do not overbeat the batter at this stage or the brownies will be cakey.

Sprinkle flour-cocoa mixture over chocolate mixture. Using a spatula (do not use a whisk!), fold the dry ingredients into the wet until there is just a trace amount of the flour-cocoa mix visible.

Pour batter into the greased pan and smooth the top with the spatula. Bake brownies for 27 to 30 minutes; brownies are done when a toothpick inserted in the center comes out with a few moist crumbs. Cool brownies completely before cutting and serving.

Tuesday, April 19, 2011

Happy Passover - Now Please Pass the Dessert


I am hear to debunk the myth that it is impossible to make a Passover cake that tastes good.

I remember a few years ago, before I had a reputation as a good cook, I offered to bring dessert to a Passover sedar at an ex-boyfriend's house. His mother made a face and told me all Passover over desserts taste like cardboard.

Proving her wrong made me very happy. That is probably one of the reasons that relationship didn't work.

But I digress. Here is an easy Passover dessert recipe that can be served with meat or dairy - it was a big hit at our sedar last night and I had to fight to get a slice for myself!

Apple Nut Cake
Adapted from The New Jewish Holiday Cookbook by Gloria Kaufer Green

For the filling:
1/2 cup finely chopped walnuts
1/4 cup sugar
1 generous teaspoon cinnamon
1 large golden delicious apple or other baking apple

Batter:

2 large eggs, one separated
1 cup sugar divided
1/3 cup canola oil
1/4 cup orange juice
3/4 cup matzah cake meal
2 large egg whites

Grease an 8'' square baking pan and set aside. Preheat oven to 350 degrees.

For the filling combine walnuts, sugar, and cinnamon, set aside.

Peel the apple if desired (it's not necessary and I don't usually do it). Core and thinly slice it.

For the batter combine 1 whole egg and one yolk (reserve the white) in a medium mixing bowl and beat with an electric mixer until thick. Gradually add 3/4 cup of the sugar and beat until light. Beat in the oil and orange juice until well combined. Then at slowest speed mix in matzah cake meal.

Put the remaining three eggs into a mixing bowl and use clean beaters to beat til frothy. Gradually add last 1/4 cup sugar and beat until forms stiff peaks. Fold whites into the matzah cake meal mixture mixing completely.

Pour half of the batter into the bottom of the prepared pan and use a spatula to spread it evenly. Sprinkle with 2/3 of the nut mixture . Arrange apple slices in one layer on top of the nuts. Cover with the remaining batter and then sprinkle the remaining nut mixture on top. Bake in the oven at 350 degrees for 40-45 minutes or until a wooden toothpick comes out clean. Cool completely on wire wrack. Cut into squares or rectangles to serve.

Thursday, April 14, 2011

It's not all easy but worth it


I realize my perception of easy has changed dramatically since I started culinary school.

I recently brought a fruit tart to work that I made over the weekend in class. My co-workers thought it looked impressive. All I saw was it's flaws...the crust was slightly uneven, the kiwi not perfectly cut. But I was still proud of it considering how neverous I was about the assignment: design a beautiful cake that could sell for $35 in a bakeshop.

The next day when I brought the cake to work, and people asked me how I did it, I told them it was easy. My stress and nervousness of the day before disappeared when I saw what I accomplished. The steps of making the crust, filling it with rasberry flavored pastry cream, cutting up fruit and the struggle to artfully arrange rasberries, kiwi, strawberries and blueberries on the tart didn't seem so difficult the morning after.

But the truth is when I am in class the work seem more than a little intimidating. There are plenty of frustrating moments when I worry that I can't do something, or I feel like I am back in the third grade being criticized by the teacher for having bad handwriting that she hinted would doom my entire future.

But the assignments I've worried about the most -like being able to roll  out croissant dough and shape it perfectly, turned out pretty good. When I start to get too frustrated, I remind myself that our instructor has been doing this for nearly 40 years. I tell myself not get discouraged that I can't get something perfect the first time, or that it is a lot harder than he makes it look.

Success rolling croissants before they want in the oven

During the week in between I mull over my successes and failures in class. After a few days pass, my confidence increases. I realize I am learning a lot and if I keep I'll be able to make it seem as easy as the chef one day. For now my creations might not make the cut at Bouchon Bakery or Balthazar, but they impress my friends and co-workers and taste pretty good. While I have a learning curve ahead of me, for now I'll take that as my little victory to celebrate.

Success! My instructor called this mini tart beautiful!

 And at leat my most important critic approves.

Jeff enjoying a chocolate croissant I made in
 class


Tuesday, April 5, 2011

My New Favorite Treat


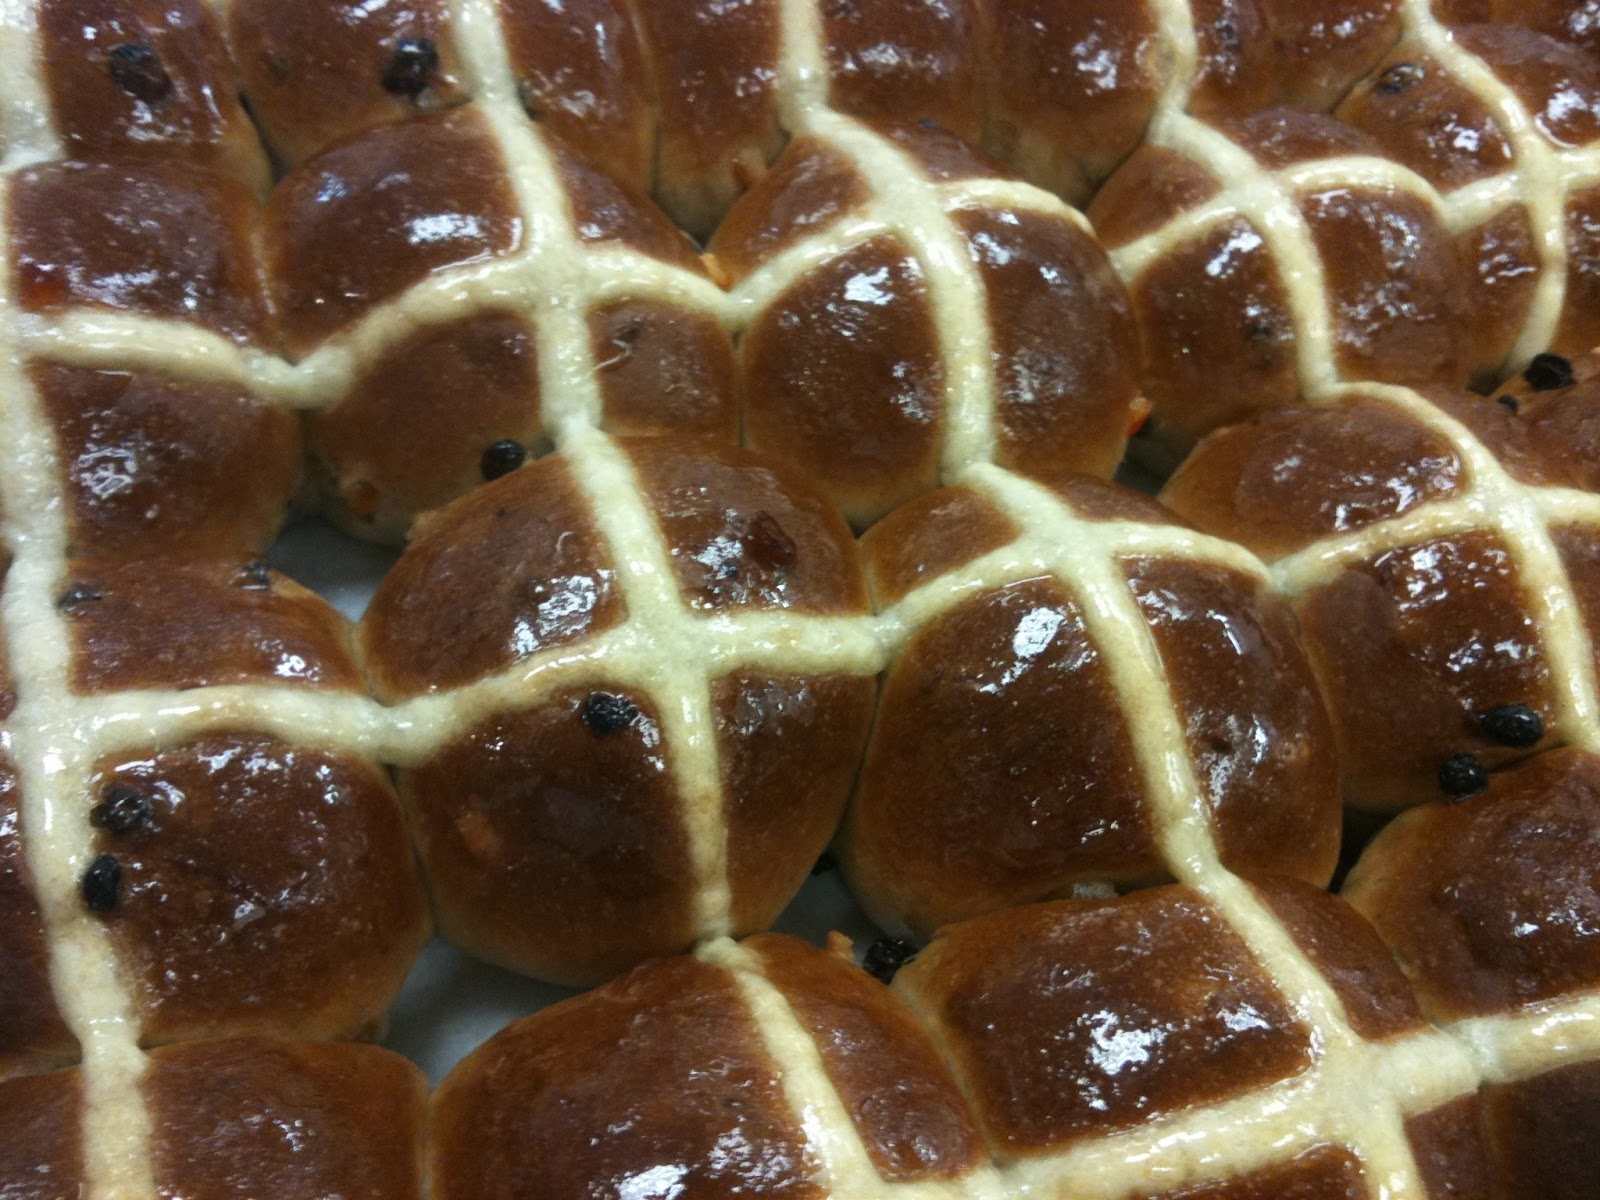
All these years that I've been spreading cream cheese on bland matzo, I've been missing out on a much more tasty treat: Hot Cross Buns.

Guess I shouldn't be surprised since these fragrant buns crop up in bakery windows in time for Easter - hence the cross.

But they are so tasty with freshly grated nutmeg, allspice and cinnamon, candied orange peel and currants mixed in the dough that I think I'll ignore their association with the holiday (like I do with cadbury eggs and chocolate bunnies) and grab some they next time I spot them in a store.

My obsession started when we made Hot Cross Buns in Chef Sim Cass's class at the Institute of Culinary Education. Cass was a founding baker at Balthazar, and I've heard him called one of the best bread makers in the country. So I feel really lucky to be in his class, no matter how rigorous it is or how beat I am when I get home.

I'll share the recipe we used in class, although it might be a little labor intensive for a home baker. But unlike some of the breads we made with Cass, these buns can be cooked in an ordinary oven so it is not impossible to make it on your own.

But if you see them in a bakery window take the easy way out pick up about half a dozen - they are so worth it!